Home
/ How To End A Friendship Bracelet Adjustable : Tuck it under the loop you made and pull it so that it's in the middle and creates a third parallel line.
How To End A Friendship Bracelet Adjustable : Tuck it under the loop you made and pull it so that it's in the middle and creates a third parallel line.
How To End A Friendship Bracelet Adjustable : Tuck it under the loop you made and pull it so that it's in the middle and creates a third parallel line.. Slide the sliding knot up towards the closure knot. Trim away the additional string. I noticed that in my last video, it was a bit confusing when i explained how to make the bracelets adjustable. Braid the last several inches of thread when your bracelet reaches the length you need, separate the two halves of the threads. Then simply tie a regular knot, slide on a bead, and repeat until all the beads are on your bracelet.
Look at the images for detail. Make sure the sliding knot is pushed closed. You can set the threads coverage as per your preferred color scheme. To make a chevron friendship bracelet, cut at least 6 strands of craft thread so they're 60 to 65 inches long. Just tie it as normal and then make braids or square knots at both ends.
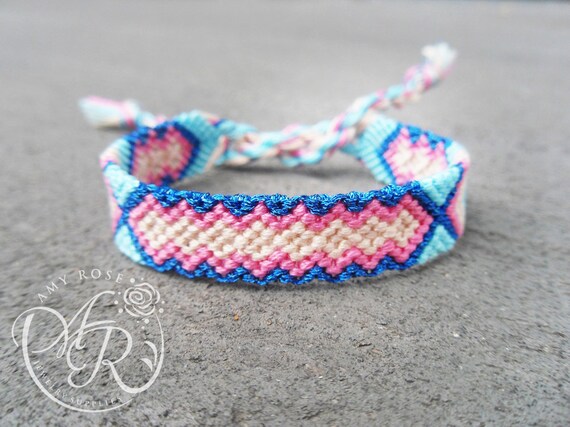
Closures Adjustable Fastener Sliding Knot Friendship Bracelets Net from friendship-bracelets.net Touch device users, explore by touch or with swipe gestures. Lay one end of the necklace or bracelet pointing down, and the other end pointing up. A foot should be long enough. Finish off with the sliding knot. Tie a knot at the end of the strands and tape it to a work surface. Then, pull the end of the thread and put the bottom over and under the top piece. Its minimum size is 6.5inch, the maximum size is 9.4inch.suitable size bracelet for women and men wearing. Begin the bracelet by taking your cut strands of embroidery floss and tying an overhand knot in one end.
Touch device users, explore by touch or with swipe gestures.
This cording will become your sliding knot. Then, put it through the bracelet and tighten it. Hit the tutorial now for step by step guidance. Super angebote für friendship bracelet designs hier im preisvergleich. Now continue to macrame with the 8 strings. Take the opposite end of the rope and pull it under the loop you made. Lay the bracelet on a flat surface, grab the very top of the loop, and fold the loop in half down and away from you. Tie the inner two stings using a simple overhand knot. Bring around the braid (s) at the other end. Now do the same with the other end of the bracelet. In today's video i will be showing you 6 different ways you can start and end your friendship bracelets! Beginning and end of 10+ string bracelets by juliaeve 6 years ago i need help, i am a beginner who has the knots down but can't make a full product. Begin the bracelet by taking your cut strands of embroidery floss and tying an overhand knot in one end.
Cut the leather lacing for easy beading. Remember that if you get tripped up, you can always start again! Take the opposite end of the rope and pull it under the loop you made. In today's video i will be showing you 6 different ways you can start and end your friendship bracelets! I noticed that in my last video, it was a bit confusing when i explained how to make the bracelets adjustable.
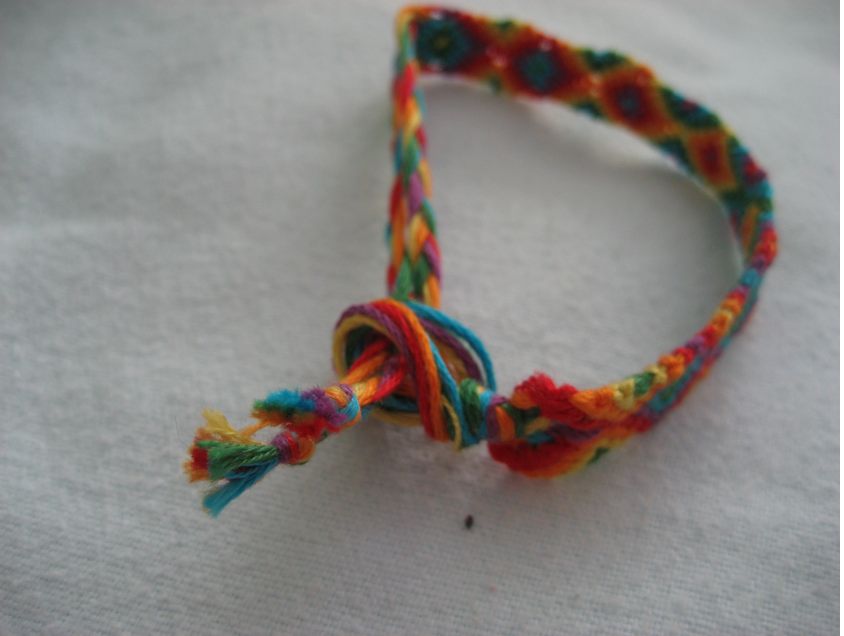
Diamond Pattern Friendship Bracelet Adjustable Sparkle Etsy from i.etsystatic.com Hit the tutorial now for step by step guidance. Once you've finished your braid, make another overhand knot at the bottom of the braid. Clip the bracelet and place the two strands like shown in the picture. The pattern part of the bracelet should be about 3/4 of your wrist, leaving 1/4 to make the adjustable knot. Make one big braid and a knot at the end. Hold the bracelet close to the looped end and pull it so that it tightens around the braid. Lay the cording underneath the two ends of the necklace or bracelet as shown. Lay one end of the necklace or bracelet pointing down, and the other end pointing up.
For the beaded friendship bracelet, first cut the end of the leather lace at an angle, which will make it easier to slide on the beads.
Best friend bracelet zu günstigen preisen. Make sure the sliding knot is pushed closed. Hit the tutorial now for step by step guidance. Do the same process for the opposite end of the string to make another adjustable knot. But, if you'd rather make a removable or adjustable bracelet, you'll want to follow one of the tutorials listed below. To open the bracelet again, just slide the knot back again and slip the closure knot out. Begin the bracelet by taking your cut strands of embroidery floss and tying an overhand knot in one end. Friendship bracelet designs zum kleinen preis hier bestellen. In today's video i will be showing you 6 different ways you can start and end your friendship bracelets! Now continue to macrame with the 8 strings. Slip the end loop over the overhand knot closure to close the bracelet : You can set the threads coverage as per your preferred color scheme. Now, put one end over the other and then put it through the bracelets and into the loop.
Clip the bracelet and place the two strands like shown in the picture. But, if you'd rather make a removable or adjustable bracelet, you'll want to follow one of the tutorials listed below. Now continue to macrame with the 8 strings. Then, put it through the bracelet and tighten it. Just tie it as normal and then make braids or square knots at both ends.
Simple Sliding Knot from i2.wp.com Ending a friendship bracelet can be as easy as tying all of the strings together in a simple knot. This video was requested a. Take the outside string and tie a single loop around the adjacent string. Just tie it as normal and then make braids or square knots at both ends. Friendship bracelet designs zum kleinen preis hier bestellen. Now, put one end over the other and then put it through the bracelets and into the loop. As you can see there is a small hole at the beginning. Melt and seal with lighter.
Now do the same with the other end of the bracelet.
Best friend bracelet zu günstigen preisen. Now do the same with the other end of the bracelet. Clip the bracelet and place the two strands like shown in the picture. Take the outside string and tie a single loop around the adjacent string. Cut the leather lacing for easy beading. 3rd, reserve 3mm tail at end. Tie the second end of the bracelet into a knot. On the first side, hold two threads together and use the other two as individual threads. If your bracelet cord tails are excessively long, trim them equally on both sides. After doing this, your bracelet will be adjustable and a lot easier to wear! Cut a second strand of cording. Beginning and end of 10+ string bracelets by juliaeve 6 years ago i need help, i am a beginner who has the knots down but can't make a full product. Trim away the additional string.
Shows how to use a single loop at the end of a bracelet to make a slidable, adjustable knot closure that that holds firmly in place, yet can easily be remove how to end a friendship bracelet. As you can see there is a small hole at the beginning.